Setting up your roaster
 Home coffee roasters who want to upgrade from a Behmore or Huky to a real commercial gas roaster should plan and prepare their roasting area. Where are you going to place your roaster? How are you going to vent your coffee roaster? Will you run propane or natural gas? Does your workspace allow you to have full access to all sides of the coffee roaster for maintenance and repair? Where will you organize and store your green coffee, supplies, and tools?
I purchased the Mill City 500 gram coffee roaster. This isn’t a small Behmore you can tuck away in a cabinet after every roast. The Mill City 500 gram roaster made by North is a full feature commercial coffee roaster packed into a small package. Careful planning needs to take place for a successful roasting experience. Based on my experience, I would like to share the answers to 5 important questions you should ask before setting up your commercial coffee roaster.
1. Where are you going to place your roaster?
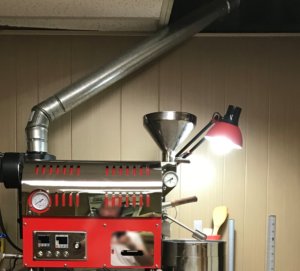
Carefully consider what you will set your roaster on. The material and height are not only for comfort but for your safety as well. I wanted my roaster to be low enough to see the top and access all sides. You want to be able to comfortably reach for the tryer, door handle and other key controls as you roast coffee. I placed my roaster on an industrial wire rack cart purchased on Amazon (see photos)
The wire cart was selected over a wooden table because of adjustability, flammability, durability, and portability. I can adjust the counter height to virtually any height I need. Wheels for this cart were not included but are available in various sizes. Remember, adding wheels can increase the height of the cart about 3 inches. I was concerned about heat from the underside of the roaster so I didn’t use wood. I went to our local granite counter retailer who had a pile of free scrap pieces. These fireproof pieces of granite are great to set the roaster on. The wire rack system also allows me to space my shelves to fit my tools, accessories, and supplies. I am very glad I picked the wire cart system as my option for a roasting counter/platform/surface.
2. How are you going to vent your coffee roaster?
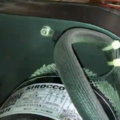
Venting your coffee roaster can be challenging. Remember, commercial coffee roasters have powerful fans that move very hot air through the drum and exhaust system. Venting into a safe outdoor space is required. Combustible gases, fumes, smoke, and chaff will blow through this vent system safety outdoors when properly set up. I purchased 3 inch “B Vent”, which is a double walled vent rated to be in contact with wood. That means the outer wall of the pipe never gets hot enough to burn anything, even wood. I can touch the stove pipe with my hand while roasting. More importantly, the pieces twist and lock together. This allows for easy disassembly and cleaning.
The best way to get these supplies is through your local “SMALL” hardware store. Be sure to take measurements of your coffee roaster area, exactly where you will position the roaster, and even draw a sketch of how you think it should vent. Take this with you to the hardware store. They will take the time to help you piece it all together and show you how it is assembled.
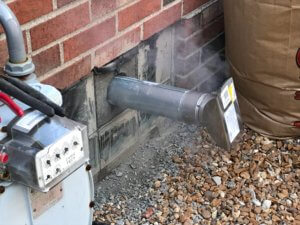
Venting A Coffee Roaster Through Glass Block – I intentionally planned to use this “B” vent pipe to vent through glass block. I tore out my old steel frame basement window and installed a glass block window with one block missing. The B Vent pipe goes through that open block. After positioning and securing the pipe with vent hangars I wrapped the pipe in cardboard and cemented around the pipe. After drying, I removed the cardboard and stuffed fiberglass insulation in the gap between the pipe and cement. This worked great! Glass block cost me about 75 dollars including all the supplies to install.
3. Will you run Propane or Natural Gas?
One of the great features of the Mill City 500 gram coffee roaster is its ability to easily convert from propane to natural gas (NG). By default, the roaster is shipped ready to burn propane. Simply connect the gas line from the propane tank to your coffee roaster and your good to go. If you plan to burn natural gas, several modifications are necessary including:
- Natural Gas Connection
- New fittings from Gas line to Roaster
- New drilled out Jets (Gas Orifice).
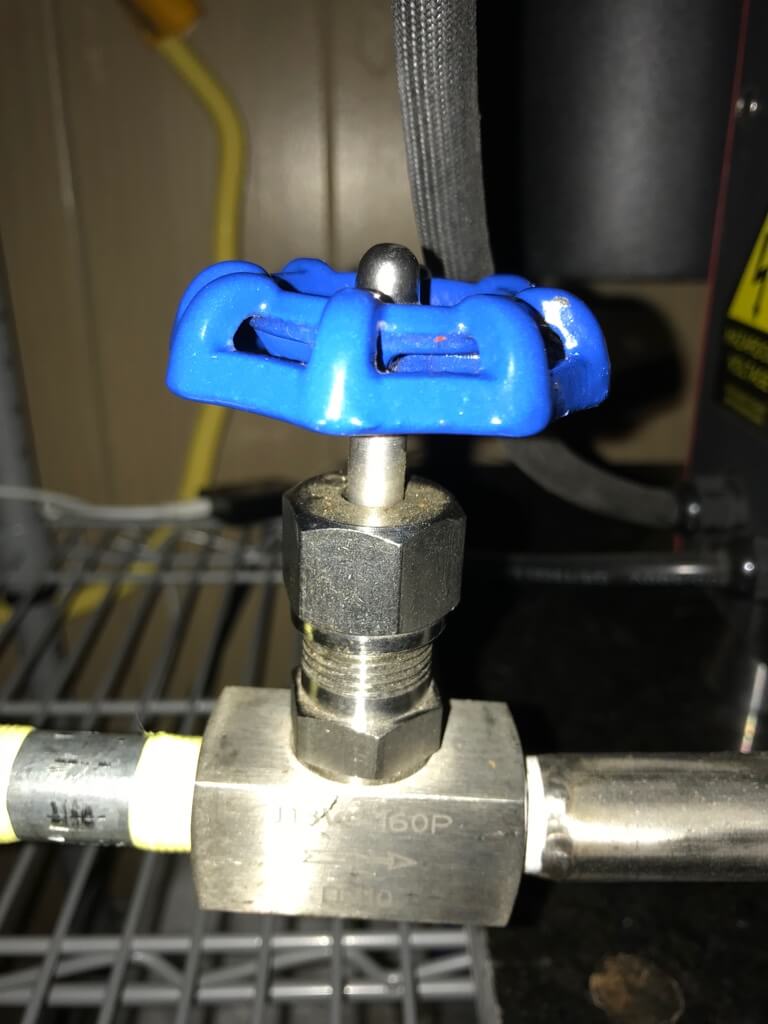
Natural Gas Connection – You will need to tap into an existing natural gas line. It is best to use a professional plumber who will pull permits and install the connections and pipe properly according to your local building code. I have the hard pipe installed from the main gas line ending next to the roaster location. There are two shut-off valves for my hard pipe. One near the original connection to the main and the other at the end of the hard pipe near the roaster. I connected a flexible gas line from the hard pipe to the roaster. In order to run my roaster, I must turn on the gas valve at the roaster and the safety against the wall where the hard pipe and flexible line connect. This is a safety backup in case the flexible line is leaking.
New fittings from the natural gas line to the coffee roaster – I took the gas valve handle that comes with the Mill City 500 gram coffee roaster to home depot. I found the correct fitting that will connect my flexible hose to the gas valve handle fitting. Other necessary supplies included pipe dope and Teflon tape.
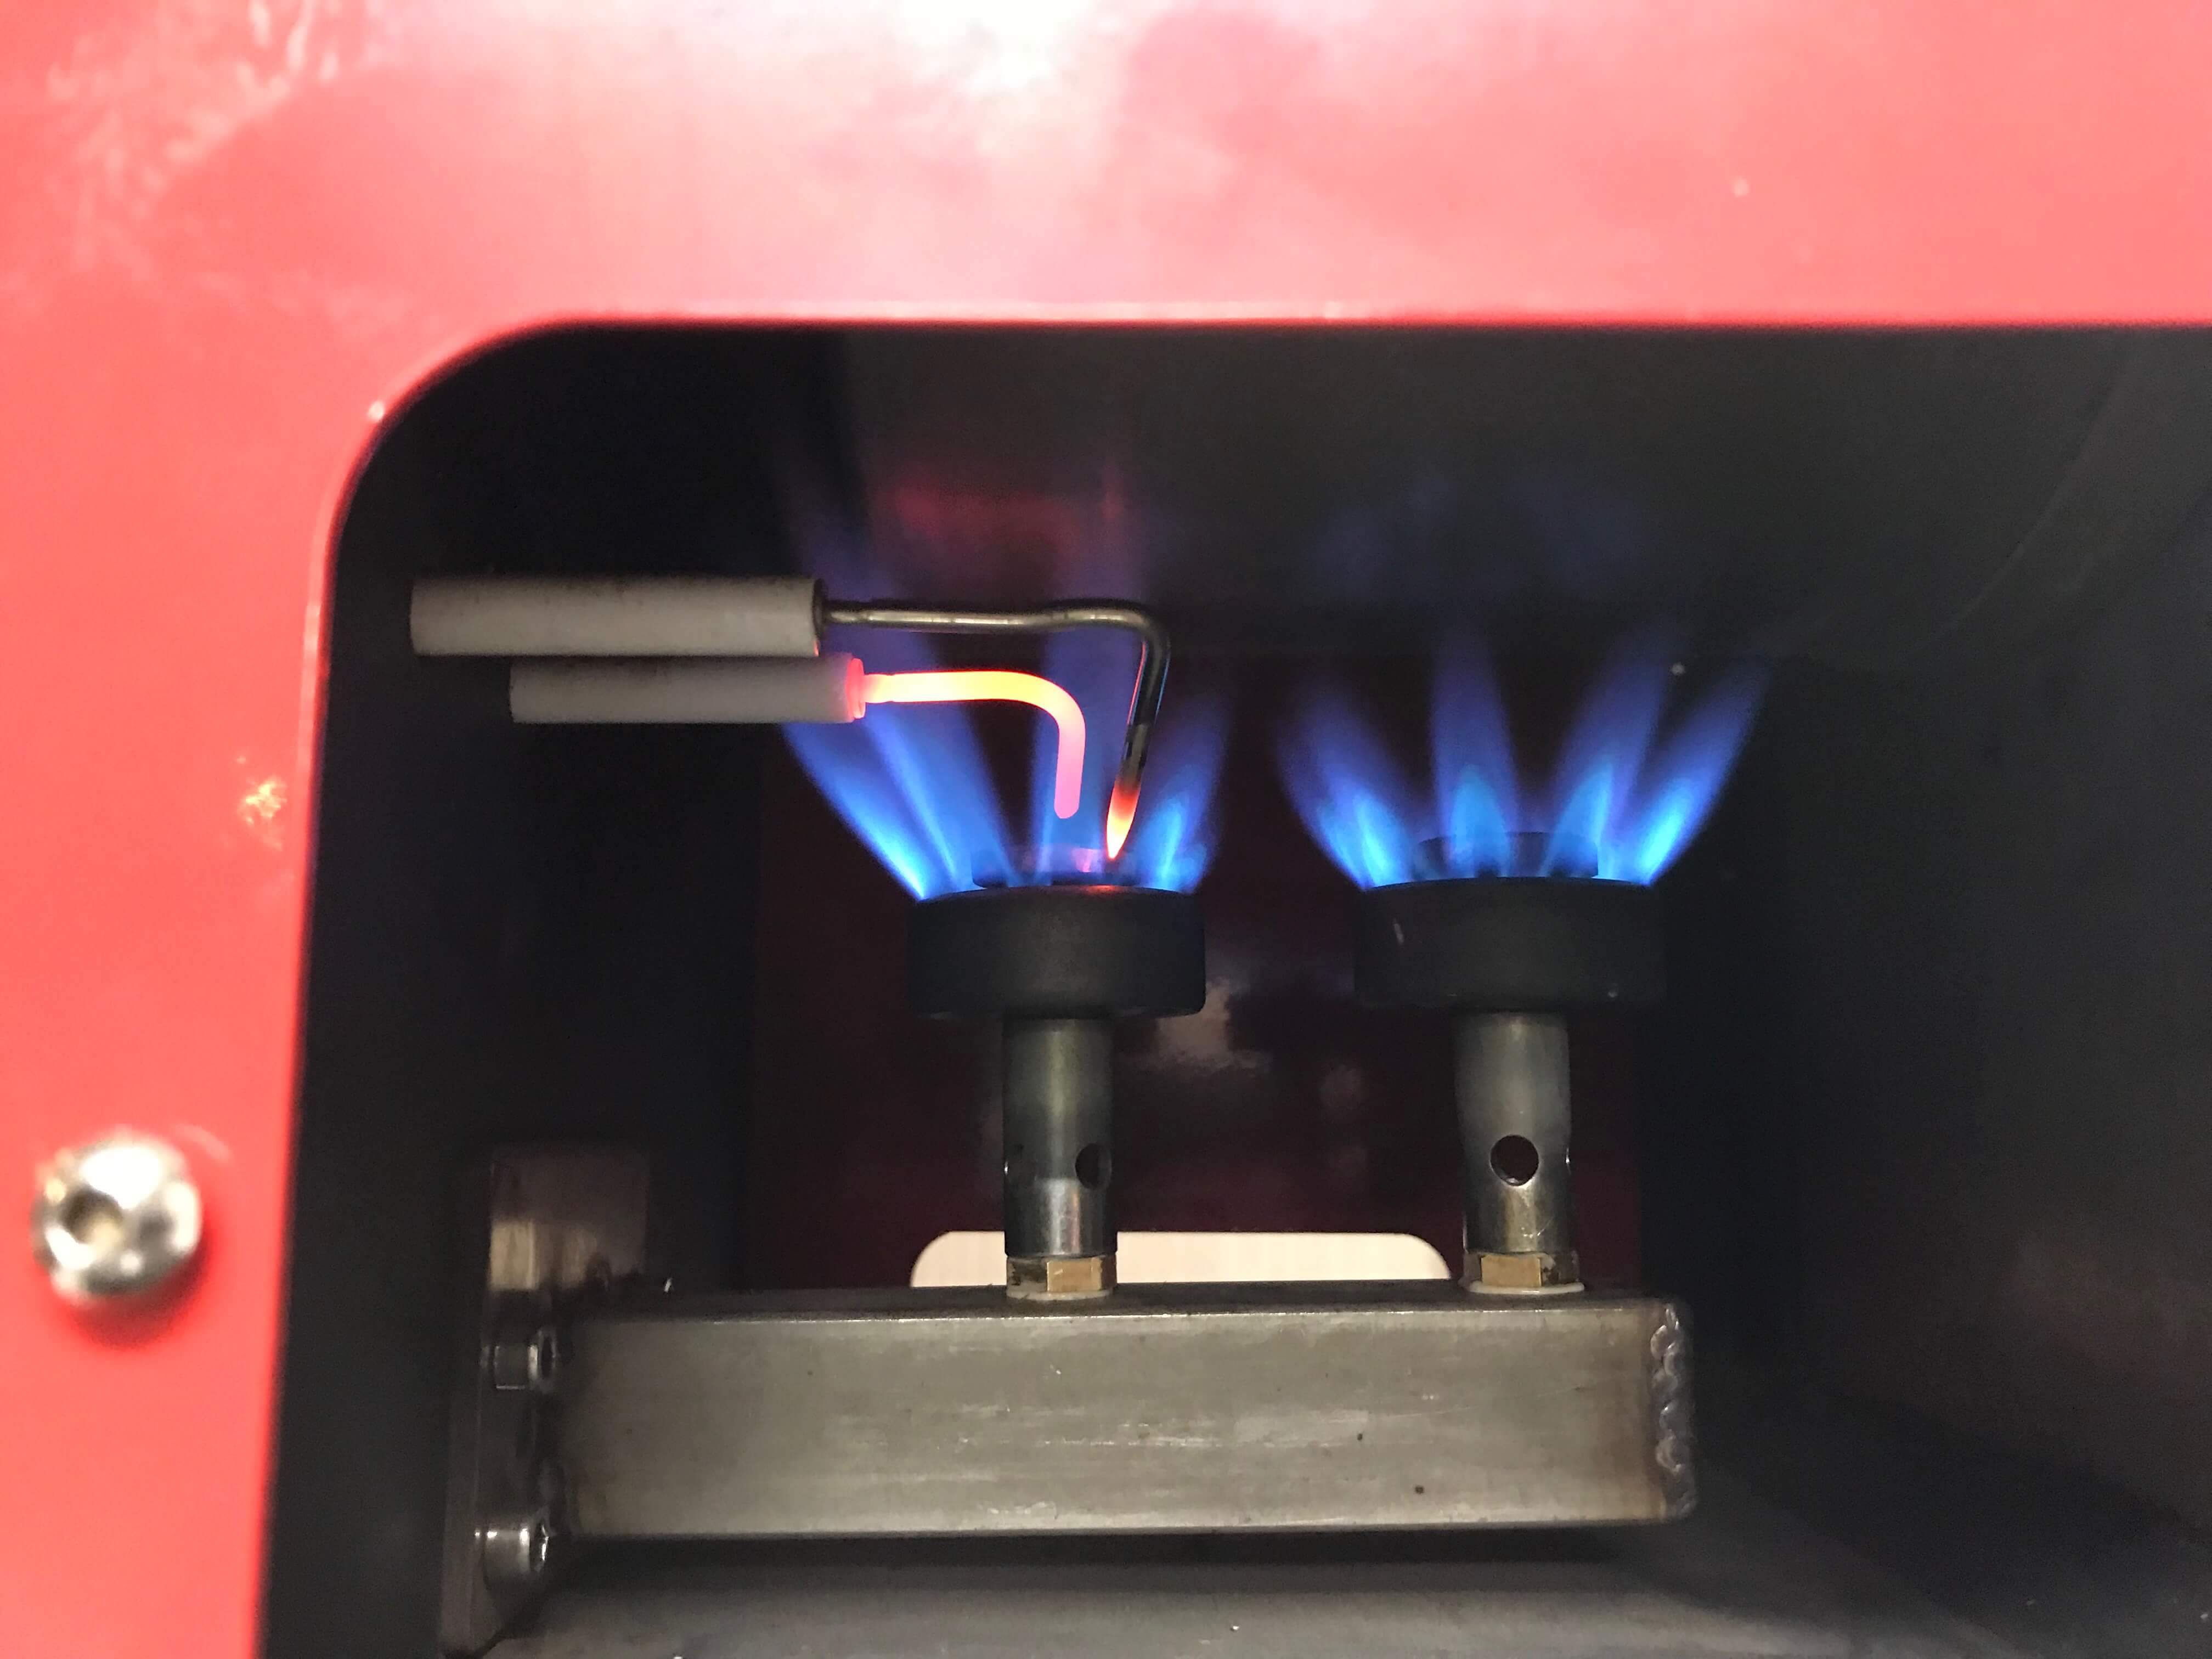
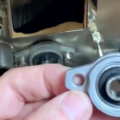
New drilled out jets (gas orifices) – Now to the burners. A larger hole/orifice is required to be drilled into the brass jets that sits beneath the tube that holds the burner (see the picture of burner flame below). A machine drill should be used your gas pressure from your gas main supply will determine the exact size hole you need. Machine bits are sized by number, like 64 or 67. The larger the number the smaller the hole. The 500-gram roaster is rated at producing 10,000 BTU so if you bring your brass jets to your local full-service hardware store, the kind of place that sharpens your mower blades, they will drill them for you. There is a chart for natural gas that will tell you an approximate size to use. I purchased 2 extra sets of jets from Mill City, allowing me to play around with different sizes. The jets come with about a 67 size hole. I think I have mine drilled to 64. There is a really good article found on the home barista forums that talks about the gas pressure chart and the size of the hole to drill into the brass jets found here BUT I would give Mill City Roasters a call and talk to Nick or Steve. How do you know when you drill enough???? Well, if your guessing and not using a chart you should watch the flame color. You don’t want a yellow flame. You don’t want a solid blue flame. I think the best approach is to discuss it with Mill City. Be sure to know your gas pressure. The reading on the roaster gauge at full gas will be a good indicator. My gauge tops at about 1.8 bars at full gas.

4. Do you have easy access to all sides of your coffee roaster for maintenance?
Proper cleaning and maintenance are essential to safe coffee roasting. The rolling cart really helps me get around all sides of the roaster. My Mill City 500 gram coffee roaster exhaust system was just cleaned after about 200 roasts. Having good access to all sides of the coffee roaster allowed me to safely and quickly complete the task with no injury to me or damage to the roaster. After every roasting session, vacuuming and cleaning the surface around the roaster is performed. Don’t have a crowded work area. Cleanliness and accessibility are critical to a safe coffee roasting experience.
5. Where will you store your green coffees, supplies, and tools?
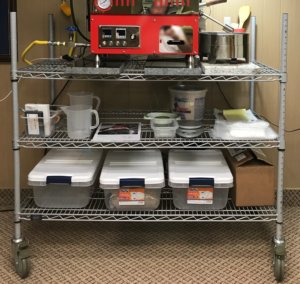
Where do you keep your roasting tools, scale, bags, containers, pitchers, and flasks? Where do you keep your green coffee? These are important questions to ask before you set up your coffee roaster. Be sure to plan where to keep your supplies and coffee when designing your roasting workspace. My cart system includes 2 additional shelves to store supplies and coffee. The middle rack holds tools to adjust the roaster. It also holds my scale to measure out green beans. Other tools include a graduated cylinder to determine bean density as well as plastic bags, coffee bags, and plastic pitchers to dump the beans into the hopper. The bottom shelf holds my green beans. I use plastic tubs to organize the coffee by age and origin.
Here is a list of the supplies I have on my second shelf:
- Spare Jets (Gas Orifice)
- adjustable wrench
- Digital scale to weigh coffee
- Graduated cylinder to measure the coffee density
- Ziploc Bags of various sizes
- Paper Coffee bags
- paint brush
- microfiber rag
- several pour pitchers
Portability
As mentioned above, this is a small roaster but it isn’t a toaster oven. It is heavy and you don’t want to be lifting and moving the roaster all the time. My cart system is the best of both worlds. If you aren’t sure about how to use your space, keep in mind accessibility, flammability, and portability. If you have to move the roaster, a cart on wheels is a pretty nice thing to have.
I’ve shared a bit out how I set up my Mill City 500 gram coffee roaster manufactured by North. Look at the pictures and video to help visualize how to set up your coffee roaster.
Related posts:
 Exhaust Fan Cleaning – North TJ-066 Mill City 500 Gram Coffee Roaster
 Mill City 500 Gram Coffee Roaster – First Impressions
 How To Replace The Front Bearing On Your North/Mill City Coffee Roaster
 Exhaust Fan Cleaning – Pt. 2 North TJ-066 Mill City 500gm Coffee Roaster
 How do I adjust the drum on a Mill City 500 gram coffee roaster?